
CBD | P4 | Ex 4: Collating and binding
- Amber Houbara

- Jul 8, 2022
- 7 min read
Reflect, evaluate and rework
Having printed your images from the previous exercise, take the opportunity to view all of the pages, reflect on them and evaluate before moving on to the next step of collating and binding the pages together. Which pages are successful? Which pages have not turned out as well as you had hoped? Are there any visual surprises, or happy accidents? Given the experimental and open-ended nature of this exercise, the answers may be quite subjective, but it is important you reflect on these and other questions, to sharpen your self-critical awareness and assessment of your own progress.
You may want to re-work some of the images, and the printing process, and this is your opportunity to do that. You may end up with more and more pieces of printed paper.
Select and collate
Evaluate the strengths and weaknesses in your work and then begin a process of selecting up to 16 pages that work well together as a whole. Do these pages have images on each side of the page, or will the images appear on facing pages only? If you want to create back-to-back images you can work manually to cut and paste images and pages, using spray mount or similar. Equally, you can collage elements of printed ephemera onto and into the pages. Again, the brief is to be experimental, so work inventively with the process, cutting, gluing, pasting and arranging as you see fit. Collate these pages, putting them into a running order from beginning to end.
Binding
Drawing on your understanding of bookbinding so far, bind your 16 pages into a small book format. How will the pages be held together? Consider how the pages might be bound and experiment with solutions. Will you create a cover? Will the pages be stitched, sewn, glued, stapled or will you use another inventive approach?
There are many ways to bind a book, either by hand or by machine. A few examples of bookbinding are saddle stitch, Japanese binding, coptic binding or perfect binding. Consider which binding is most appropriate for your book. There are some good tutorials online of bookbinding and this might be useful for you to have a look at. Try to use one of the bookbinding techniques mentioned above for your own book.
Document the whole process, photograph the book and incorporate them into your learning log, accompanied by supporting work, including pages and images you chose not to include into the final book form.
Reflect, evaluate and rework


I know this is going to maybe sound a little bit subjective, but I am so extra happy with my work. I tend to be my worst critic, and I really always find the faults in my work or how not good enough I am. But I am so happy!
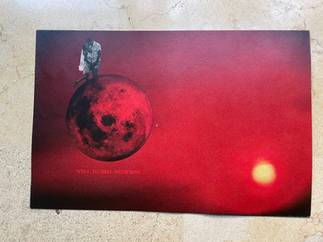
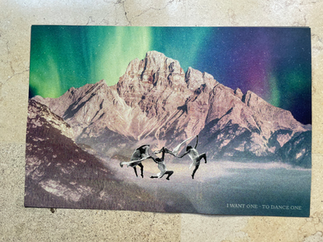
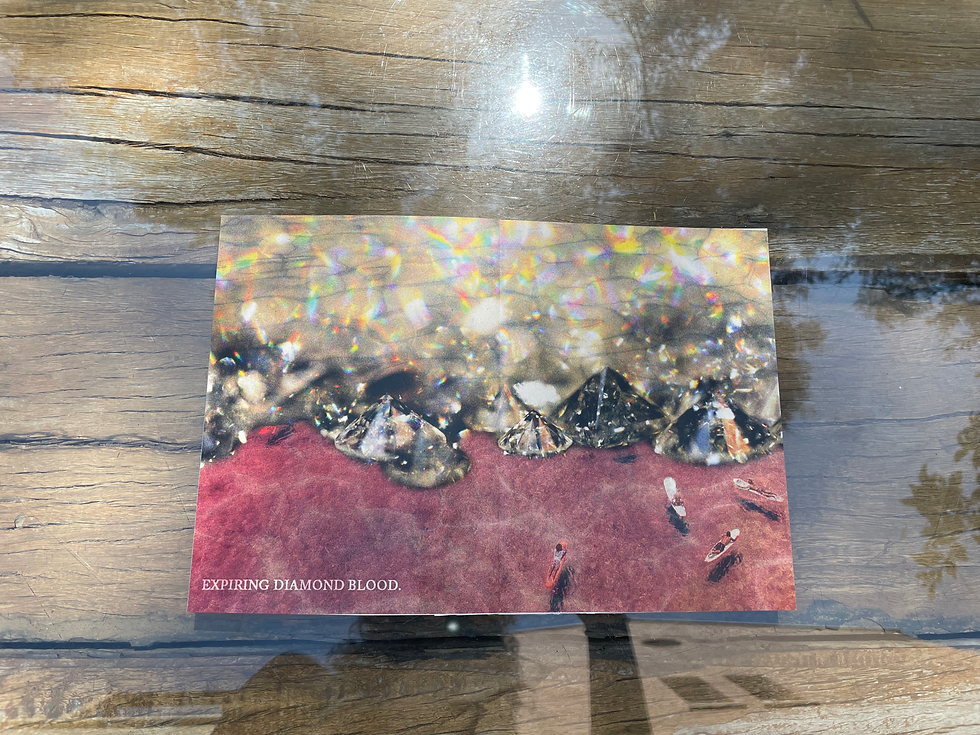
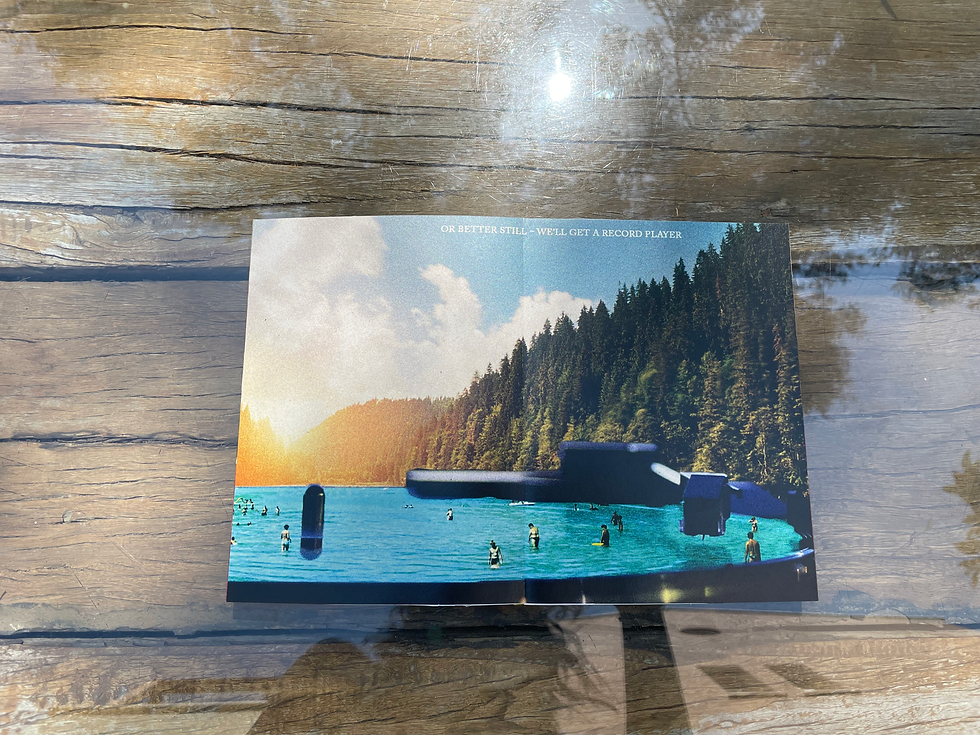
Firstly, my photomontages skills really improved this project, I really feel like I love doing it now, rather than being a bit afraid and distant from this mix media genre.
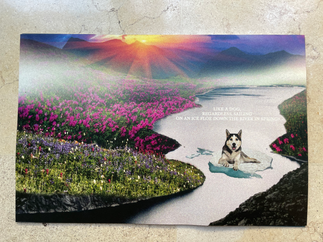
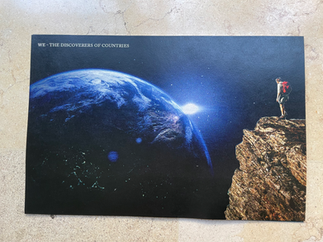
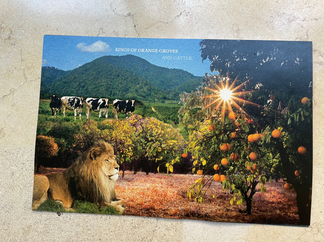
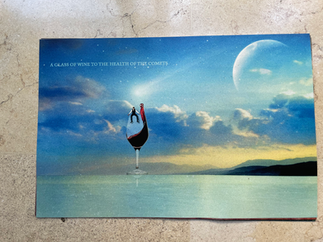
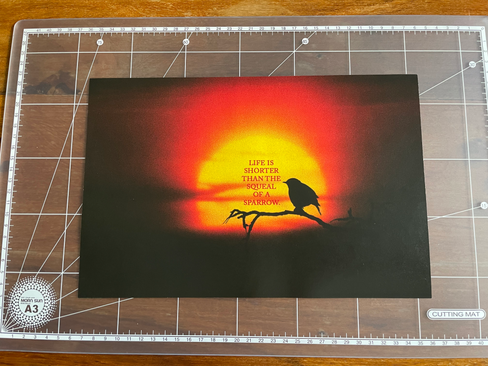
I am very proud of myself with using all these very modern images and still creating the mood I wanted, making it look old by using filters and colour adjustments.
I al extra happy with the quality of the print, I have asked my sister for a recommendation of a high quality print place, and they really did a good job!
I also am very happy with the paper choice, it seems like the thickness is not too thin for the images to be beautiful and still not show on the other side.
I really don't want to change a thing.
Select and collate
My intention for this exercise, is to use all my designs (16 designs) as 16 pages (same like what I did on the previous exercise) so that they are open flat and even though they are folded, they are all used as a horizontal A4 page.
To be exact just below A4, as I have asked the print to cut the margins which I left above and below. All my designs were based on the ratio of 715 x 1080 pixels (I have scaled it up for the sake of quality of course) - a happy mistake I have to say, as I just started by this size (not sure even why!) and when I see the final result it seems cool as it is just a tiny bit wider than a usual ratio of A4/ A5 etc...
The options I was given on this exercise were saddle stitch, Japanese binding, coptic binding or perfect binding.
I want to make sure it is flat, and pretty when flat, without the holes of Coptic binding and without losing the inside margins of Japanese binding etc.
So I have asked my tutor if I can use this seamless flat-book tutorial as my binding option, and she agreed.
I will use the method of this tutorial (using self adhesive sheets) to make sure my pages will be double sided.
I started getting to work by making sure I have all materials.
I made sure all my pages are in the correct order, of the poem, and started to fold all of them one by one. I couldn't find a bone folder anywhere in town and waiting for a shipment from an online source such as Amazon would take too long, so I used a plastic ruler to make sure the folding is neat and tight.


on the previous exercise, I have created a pamphlet. It was a good training of how to create this book, and also gave me an insight which was very important!
As I asked the print place to cut the edges, and the sides of the paper weren't 100% the same, when I sticked the folded paper on the previous exercise I was sticking them to be exact on the outside instead of the inside, which created a very funny difference so the whole pamphlet was not straight!
A great lesson to, this time, give more attention to the inside fold of the book (which I also saw the tutorial is showing).

I used self adhesive sheets, which are basically a double sided sticker paper, luckily I have found it in a local paper supplier online and could pick it up the next day.
I had to be very careful and it took quite a while to stick all the pages together, as I also had to keep cutting the edges of the self adhesive sheets as they were A5 and as I mentioned above my top and bottom are slightly smaller than A5.
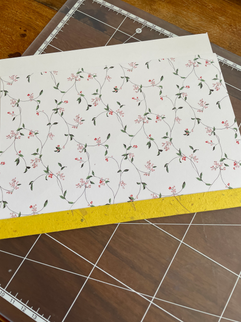
Book Cover
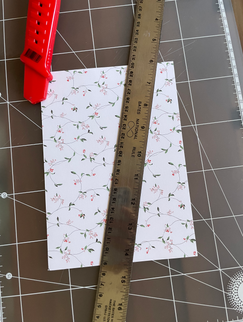
Once the pages were ready, I started thinking about the book cover, I bought a couple of nice papers from a local art shop, as I wanted to create some kind of a homage to the original design with the yellow background and nice old-school flowers.
Both of them were A4 which was great, but as I have a spine now, I needed this extra bit for my spine.
I decided to create the spine almost like a hard cover book cloth from the thin recycled yellow paper.
I measured around 0.5 cm for the spine + I wanted it to overlap like a book cloth in the front and back so I added twice more 0.5.
The yellow paper was very thin, so I decided to fold it a couple of times to have enough thickness, until I have 1.5-2 cm width (just in case), and I sticked it together so it won't be messy.
I cut the flower paper in half, so that way the extra yellow paper will give me more width to wrap the whole book.
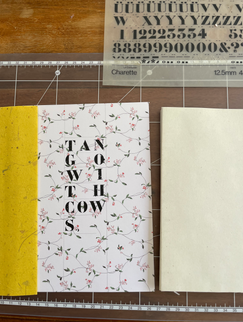
Front Cover Typography
Before I proceeded to glue them together, I wanted to create some kind of a nice typography for the cover. I remembered my father has a few boxes of Letterset and I knew that would be really cool to create the title with it. I had very little chances to experiment, and my idea was to create a rectangle with the letters as in my sketch.
I chose a font called 'Charrette' from my father's Letraset box.
I had to draw my lines to make everything straight, with a thick old pencil, and create the tracing very slowly and mindfully so I don't make mistakes. I was very content I did it perfectly!
Then I wanted to create the same idea but also on page 1 of the book, so I did the same pencil guides, and started working, I was mindful but maybe a bit less than before this time, as when I got to half way I have realised I am working on the back of the book! I had to finish it and it was actually a great mistake as it was cool to have it as the last page upside down (as all this poem feels a bit upside down). I started again, and made the third letterset design, this time on the actual front page of the book. Again, I wasn't 100% mindful and made a little mistake which I had to cover with a white pen, but it doesn't show so much...
I am pretty happy with my results so far!
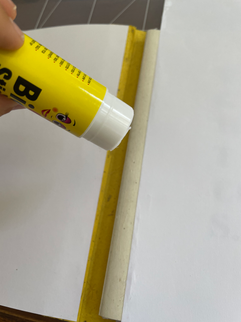
Now it was the time to glue the cover, I had to be very careful to make sure it will be aligned right and create the scoring. I glue with a stick glue the inside of the book (same like in the tutorial) and folded nicely to create the scoring. Then let it dry while pressed by a bigger book.
I am very very excited about my results so far and to see I made this whole book myself and by hand!


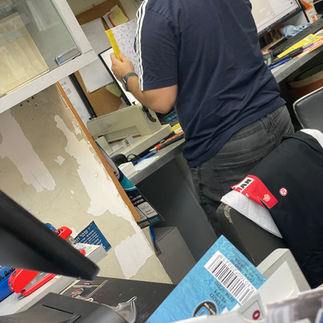
Now the last thing to do is cropping the edges, I wanted to make it perfect so I was looking to see if there is any guillotine services near me and not to cut with the knife layer after layer.


Reflection Ex3+4
This whole project, from beginning to end was really one of my favourite to date!
First of all, I was pushed constantly out of my comfort zone, working with Photomontages which I wasn't so into / good at. Then thinking about creative ways to bind and work around making a book, and eventually making my first ever book by hand! so so exciting and so much fun!
I am very very proud of myself with the whole process and how I have improved and didn't give up to any problems along the way. I have learnt a lot so far about printing and binding and the different ways.


Comments